Toyota Camry (XV70): Installation
INSTALLATION
PROCEDURE
1. INSTALL STEREO COMPONENT AMPLIFIER ASSEMBLY
2. INSTALL NO. 2 AMPLIFIER BRACKET
(a) Install the No. 2 amplifier bracket with the 2 screws.
3. INSTALL NO. 1 AMPLIFIER BRACKET
(a) Install the No. 1 amplifier bracket with the 2 screws.
4. INSTALL STEREO COMPONENT AMPLIFIER ASSEMBLY WITH BRACKET
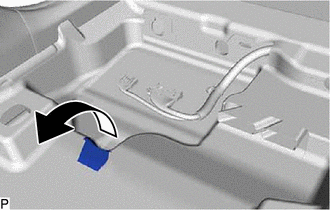
| (a) Turn back the front floor carpet assembly and front floor mat as shown in the illustration. |
|
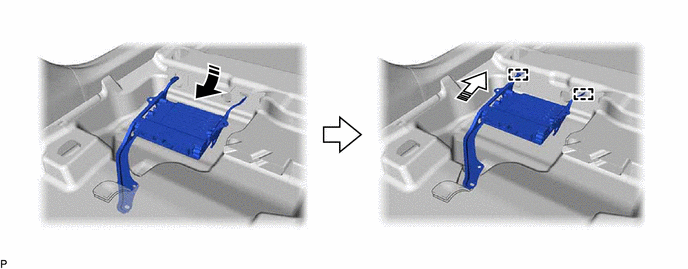
(b) Engage the 2 guides to temporarily install the stereo component amplifier assembly with bracket as shown in the illustration.
.png) |
Install in this Direction (1) |
.png) |
Install in this Direction (2) |
(c) Install the stereo component amplifier assembly with bracket with the bolt.
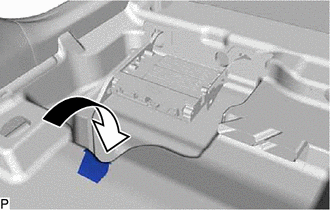
| (d) Install the front floor carpet assembly and front floor mat to its original position as shown in the illustration. |
|
(e) Engage the clamp.
(f) Connect each connector.
5. INSTALL AUDIO AMPLIFIER COVER
(a) Install the audio amplifier cover with the 3 clips.
6. INSTALL FRONT SEAT ASSEMBLY LH
Click here .gif)
READ NEXT:
 Stereo Jack Adapter Assembly
ComponentsCOMPONENTS ILLUSTRATION
*1 LOWER CENTER INSTRUMENT PANEL FINISH PANEL
*2 NO. 1 METER HOOD CLUSTER
*3 NO. 1 STEREO JACK ADAPTER ASSEMBLY
- - RemovalRE
Back-up Battery
ComponentsCOMPONENTS ILLUSTRATION
*1 BACK-UP BATTERY
*2 TRANSCEIVER COVER RemovalREMOVAL CAUTION / NOTICE / HINT
The necessary procedures (adjustment, calibration, initializat
SEE MORE:
RSA (Road Sign Assist)
Summary of function
The RSA system recognizes specific
road signs using the front
camera and/or navigation system
(when speed limit information is
available) to provide information
to the driver via the display.
If the system judges that the vehicle is being driven over the speed
limit, pe
Removal
REMOVAL CAUTION / NOTICE / HINT
The necessary procedures (adjustment, calibration, initialization, or registration) that must be performed after parts are removed and installed, or replaced during automatic light control sensor removal/installation are shown below. Necessary Procedures After Part
