Toyota Camry (XV70): Disassembly
DISASSEMBLY
PROCEDURE
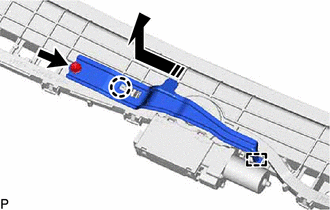
1. REMOVE SLIDING ROOF DRIVE GEAR SUB-ASSEMBLY
(a) Remove the bolt.
.png) |
Remove in this Direction |
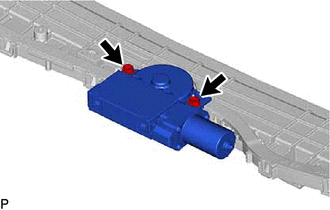
(b) Disengage the claw and guide as shown in the illustration to remove the map light bracket.
| (c) Remove the 2 bolts and sliding roof drive gear sub-assembly. |
|
2. REMOVE SUNSHADE TRIM SUB-ASSEMBLY
(a) Remove the screw.
|
|
Remove in this Direction (1) |
.png) |
Remove in this Direction (2) |
HINT:
Use the same procedure for the RH side.
(b) Move the sliding roof piece sub-assembly LH in the direction indicated by the arrow (1) shown in the illustration to disengage the guide.
HINT:
Use the same procedure for the RH side.
(c) Move the sliding roof piece sub-assembly LH in the direction indicated by the arrow (2) shown in the illustration to disengage the 2 claws and remove the sliding roof piece sub-assembly LH.
HINT:
Use the same procedure for the RH side.
(d) Remove the rear sliding roof sunshade stopper as shown in the illustration.
|
|
Remove in this Direction |
HINT:
Use the same procedure for the RH side.
(e) Slide and remove the sunshade trim sub-assembly as shown in the illustration.
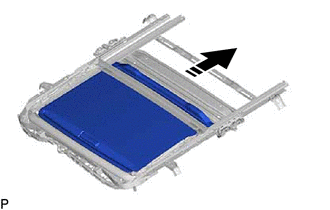
|
|
Remove in this Direction |
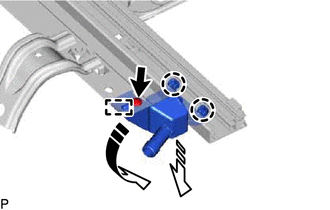
3. REMOVE SLIDING ROOF DRIVE CABLE SUB-ASSEMBLY
NOTICE:
Do not disassemble the sliding roof drive cable sub-assembly except when replacing it.
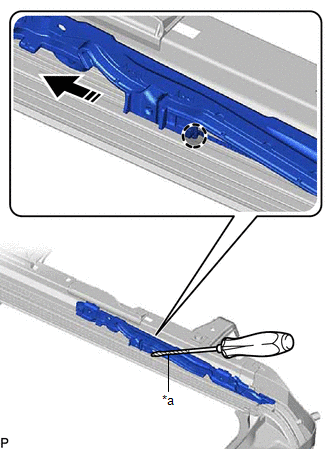
(a) Using a screwdriver, disengage the 2 claws as shown in the illustration.
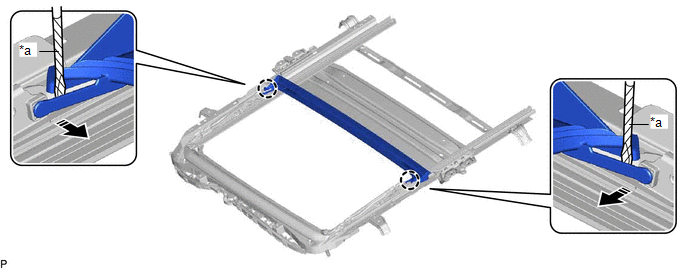
|
*a | Protective Tape |
- | - |
|
|
Remove in this Direction |
- | - |
HINT:
Tape the screwdriver tip before use.
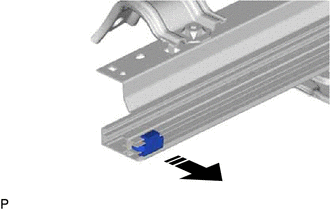
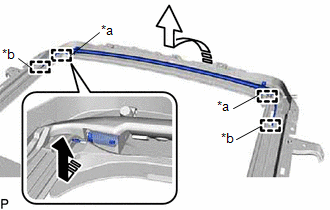
(b) Slide and remove the rear roof drip channel as shown in the illustration.
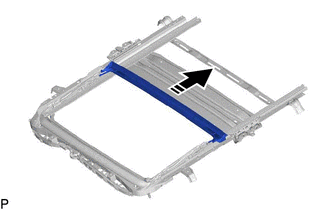
|
|
Remove in this Direction |
(c) Hold down the roof wind deflector panel sub-assembly.
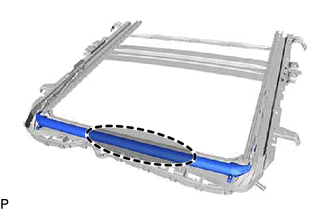
.png) |
Hold Position |
(d) Using a screwdriver, slide the sliding roof drive cable LH as shown in the illustration to remove it.
|
*a | Protective Tape |
|
|
Push Position |
|
|
Remove in this Direction |
HINT:
- Tape the screwdriver tip before use.
- Use the same procedure for the RH side.
4. REMOVE ROOF WIND DEFLECTOR PANEL SUB-ASSEMBLY
(a) Pull each spring in the direction indicated by the arrow (1) shown in the illustration to disengage the 2 springs.
|
*a | Spring |
|
*b | Guide |
|
|
Remove in this Direction (1) |
|
|
Remove in this Direction (2) |
(b) Pull the roof wind deflector panel sub-assembly in the direction indicated by the arrow (2) shown in the illustration to disengage the 2 guides and remove it.
READ NEXT:
 Reassembly
REASSEMBLY PROCEDURE 1. INSTALL ROOF WIND DEFLECTOR PANEL SUB-ASSEMBLY
(a) Move the roof wind deflector panel sub-assembly in the direction indicated by the arrow (1) shown in the illustration to e
Installation
INSTALLATION PROCEDURE 1. INSTALL SLIDING ROOF HOUSING ASSEMBLY
(a) Loosen the 4 bolts of the brackets of the sliding roof housing assembly.
(b) Temporarily install the sliding roof housing asse
SEE MORE:
Data List / Active Test
DATA LIST / ACTIVE TEST DATA LIST NOTICE:
In the table below, the values listed under "Normal Condition" are reference values. Do not depend solely on these reference values when deciding whether a part is faulty or not.
HINT: Using the Techstream to read the Data List allows the values or state
Installation
INSTALLATION CAUTION / NOTICE / HINT
NOTICE:
Before replacing the main body ECU (multiplex network body ECU), refer to Registration.
w/ Smart Key System: Click here
w/o Smart Key System: Click here
After the main body ECU (multiplex network body ECU) has been replaced, the a
