
Toyota Camry (XV70): Disassembly
DISASSEMBLY
PROCEDURE
1. REMOVE AIR FILTER COVER PLATE
(a) Disengage the claw and 2 guides as indicated by the arrows, in the order shown in the illustration to remove the air filter cover plate.
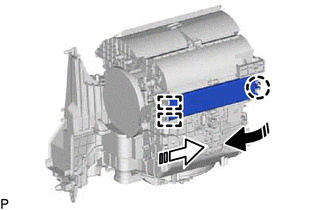
 |
Remove in this Direction (1) |
 |
Remove in this Direction (2) |
2. REMOVE CLEAN AIR FILTER
(a) Remove the air filter sub-assembly as shown in the illustration.
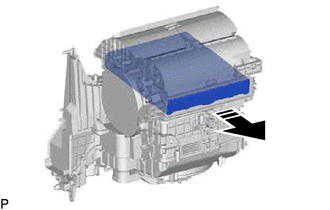
|
|
Remove in this Direction |
| (b) Disengage the 4 guides to remove the clean air filter from the air filter case. |
|
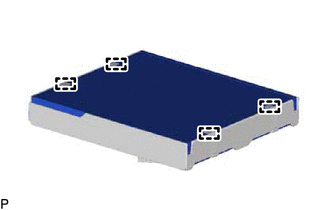
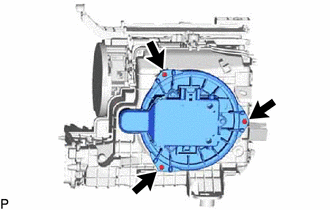
3. REMOVE BLOWER MOTOR WITH FAN SUB-ASSEMBLY
| (a) Remove the 3 screws and blower motor with fan sub-assembly. |
|
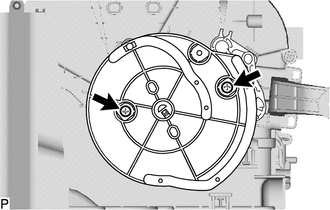
4. REMOVE NO. 1 BLOWER DAMPER SERVO SUB-ASSEMBLY
| (a) Remove the 2 screws and No. 1 blower damper servo sub-assembly. |
|
READ NEXT:
 Reassembly
REASSEMBLY PROCEDURE 1. INSTALL NO. 1 BLOWER DAMPER SERVO SUB-ASSEMBLY
(a) Connect the 2 links of the blower assembly to the 2 grooves on the plate of the No. 1 blower damper servo sub-assembly a
Installation
INSTALLATION PROCEDURE 1. INSTALL BLOWER ASSEMBLY
(a) Engage the 2 guides and 2 claws. (b) Install the blower assembly to the air conditioning radiator assembly with the 2 screws.
(c) Engage each gu
SEE MORE:
Check Bus 1 Line for Short to GND
DESCRIPTION There may be a short circuit between one of the CAN bus lines and GND when there is no resistance between terminal 23 (CA1H) of the central gateway ECU (network gateway ECU) and terminal 4 (CG) of the DLC3, or terminal 8 (CA1L) of the central gateway ECU (network gateway ECU) and termina
Removal
REMOVAL CAUTION / NOTICE / HINT
HINT:
Use the same procedure for the RH side and LH side.
The following procedure is for the LH side.
PROCEDURE 1. REMOVE FRONT DOOR SCUFF PLATE
Click here
2. DISCONNECT FRONT DOOR OPENING TRIM WEATHERSTRIP Click here
3. REMOVE REAR DOOR SCUF
© 2023-2026 Copyright www.tocamry.com
