
Toyota Camry (XV70): Disassembly
DISASSEMBLY
PROCEDURE
1. REMOVE NO. 2 ROOF SILENCER (for Normal Roof)
(a) Remove the No. 2 roof silencer.
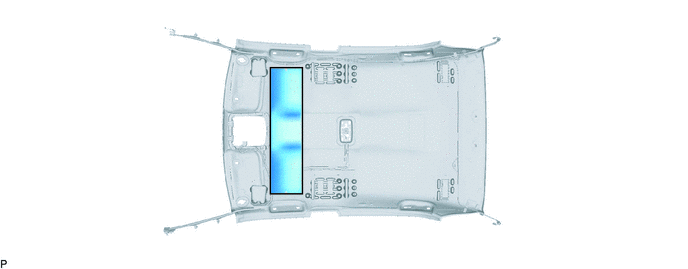
2. REMOVE NO. 4 ROOF SILENCER (for Normal Roof)
(a) Remove the No. 4 roof silencer.
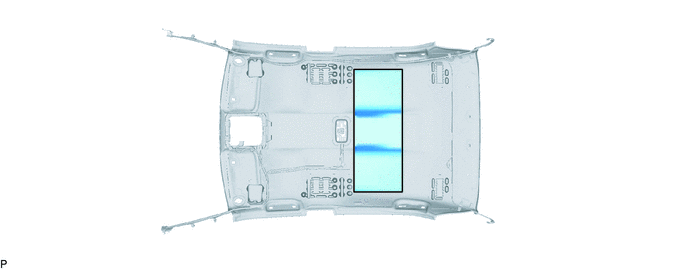
3. REMOVE NO. 2 ANTENNA CORD SUB-ASSEMBLY
Click here .gif)
4. REMOVE NO. 1 ROOF WIRE (for Normal Roof)
(a) Remove the adhesive tape from the roof headlining assembly.
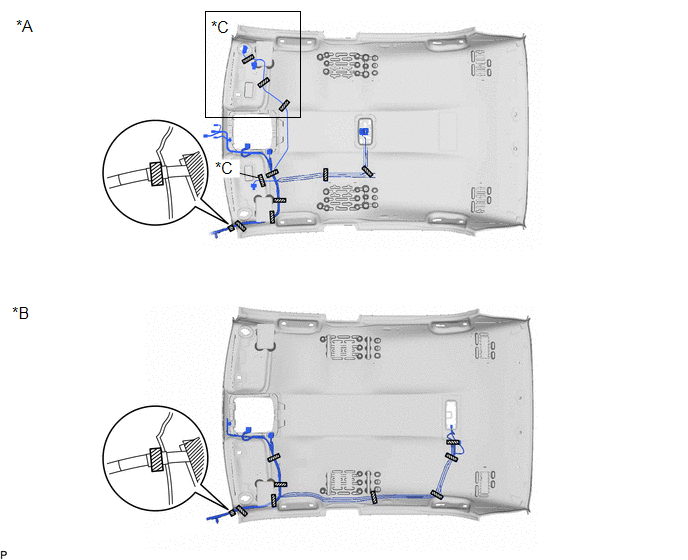
|
*A | w/ Room Light Assembly |
*B | w/ Spot Light Assembly |
|
*C | w/ Vanity Light |
- | - |
.png) |
Adhesive Tape | - |
- |
(b) w/ Vanity Light:
(1) Turn the 2 visor connectors counterclockwise approximately 90° and remove them from the roof headlining assembly.
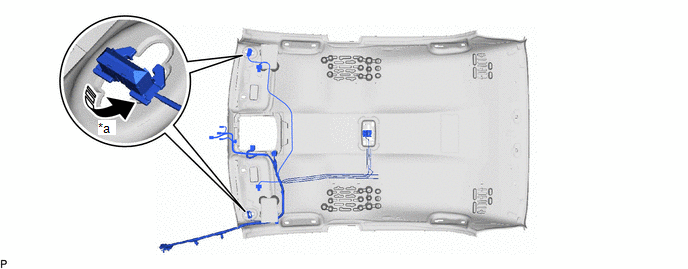
|
*a | 90° |
- | - |
.png) |
Rotation Direction | - |
- |
(c) Disengage 4 clamps and remove the No. 1 roof wire from the roof headlining assembly.
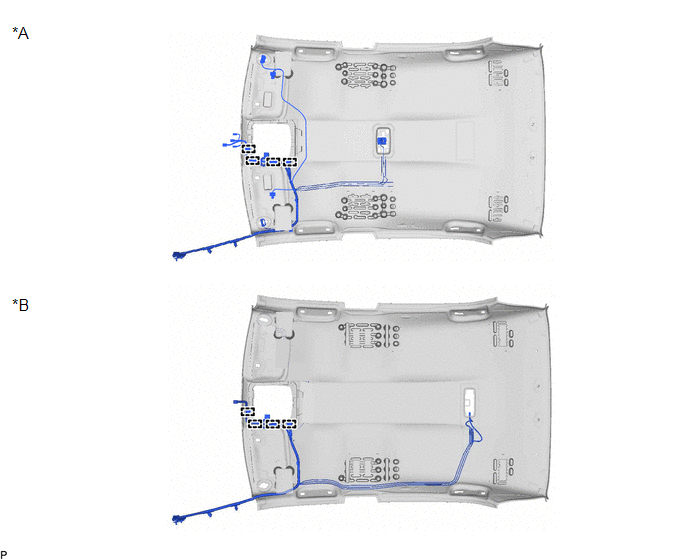
|
*A | w/ Room Light Assembly |
*B | w/ Spot Light Assembly |
5. REMOVE NO. 1 ROOF WIRE (for Except Normal Roof)
(a) Remove the adhesive tape from the roof headlining assembly.
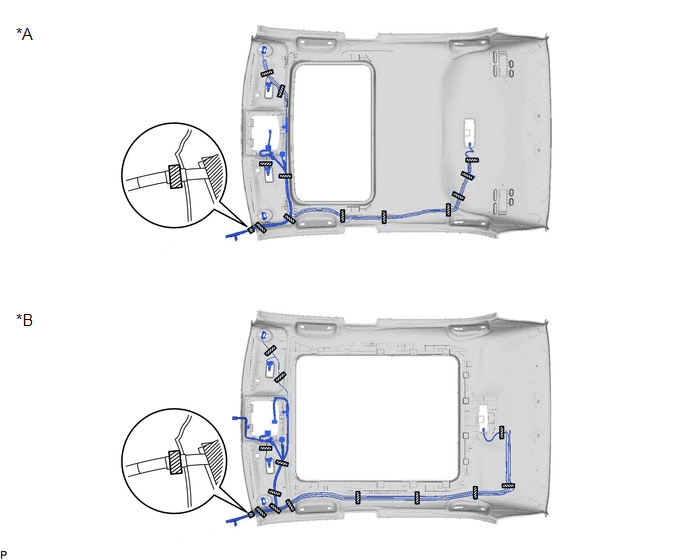
|
*A | for Moon Roof |
*B | for Panoramic Moon Roof |
|
|
Adhesive Tape | - |
- |
(b) Turn the 2 visor connectors counterclockwise approximately 90° and remove them from the roof headlining assembly.
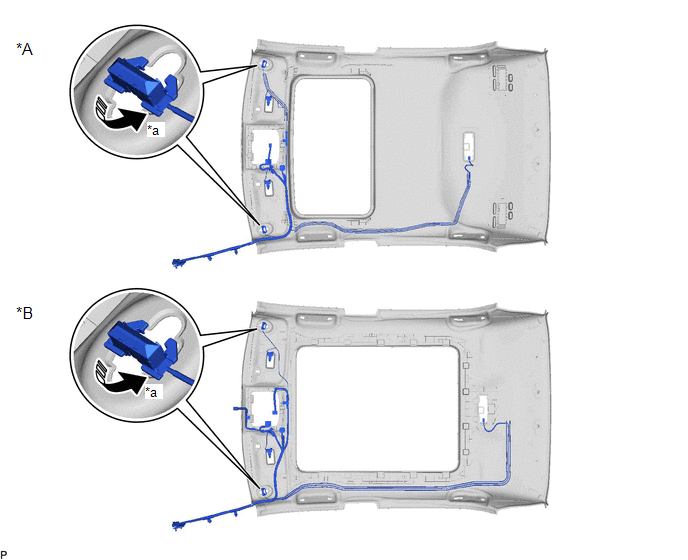
|
*A | for Moon Roof |
*B | for Panoramic Moon Roof |
|
*a | 90° |
- | - |
|
|
Rotation Direction | - |
- |
(c) Disengage each clamp and remove the No. 1 roof wire from the roof headlining assembly.
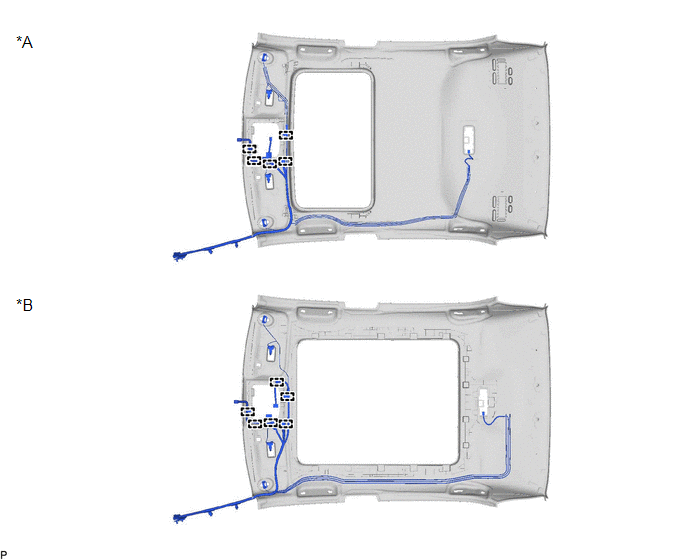
|
*A | for Moon Roof |
*B | for Panoramic Moon Roof |
READ NEXT:
SEE MORE:
 Touch Panel Switch does not Function
CAUTION / NOTICE / HINT
NOTICE:
Depending on the parts that are replaced during vehicle inspection or maintenance, performing initialization, registration or calibration may be needed. Refer to Precaution for Audio and Visual System.
Click here
When replacing the radio and display
HO2S Heater Control Bank 1 Sensor 1 Circuit Short to Battery (P003012,P003013,P005012,P005013,P101A9E,P103A9E)
DESCRIPTION Refer to DTC P219519. Click here
HINT:
When any of these DTCs are stored, the ECM enters fail-safe mode. The ECM turns off the air fuel ratio sensor heater in fail-safe mode. Fail-safe mode continues until the engine switch is turned off.
Although the DTC titles say oxygen
