
Toyota Camry (XV70): Front Console Light
Components
COMPONENTS
ILLUSTRATION
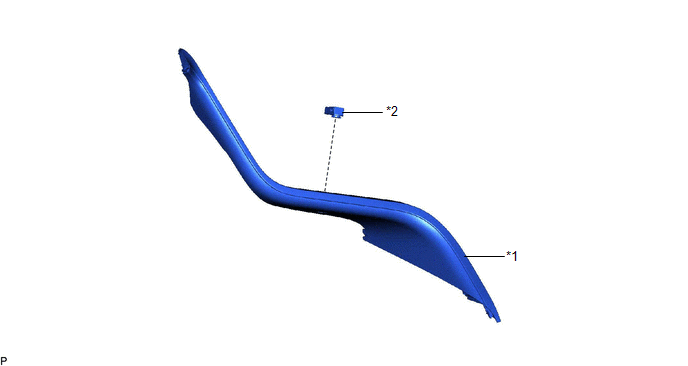
|
*1 | NO. 1 METER HOOD CLUSTER |
*2 | NO. 2 INTERIOR ILLUMINATION LIGHT SUB-ASSEMBLY |
Removal
REMOVAL
PROCEDURE
1. REMOVE NO. 1 METER HOOD CLUSTER
Click here
.gif)
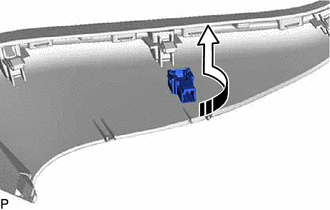
2. REMOVE NO. 2 INTERIOR ILLUMINATION LIGHT SUB-ASSEMBLY
(a) Turn the No. 2 interior illumination light sub-assembly as shown in the illustration to remove it.
.png) |
Remove in this Direction |
Inspection
INSPECTION
PROCEDURE
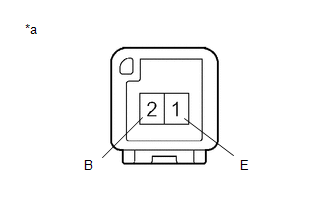
1. INSPECT FRONT CONSOLE LIGHT (NO. 2 INTERIOR ILLUMINATION LIGHT SUB-ASSEMBLY)
|
*a | Component without harness connected (Front Console Light (No. 2 Interior Illumination Light Sub-assembly)) |
(a) Apply battery voltage to the connector and check that the front console light comes on.
OK:
|
Measurement Condition | Condition |
Specified Condition |
|---|---|---|
|
Battery positive (+) > 2 (B) Battery negative (-) > 1 (E) |
Always | Front console light comes on |
If the result is not as specified, replace the front console light (No. 2 interior illumination light sub-assembly).
Installation
INSTALLATION
PROCEDURE
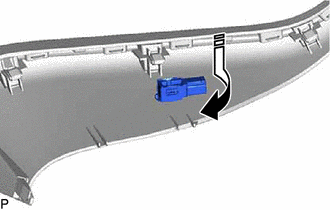
1. INSTALL NO. 2 INTERIOR ILLUMINATION LIGHT SUB-ASSEMBLY
(a) Turn the No. 2 interior illumination light sub-assembly as shown in the illustration to install it.
.png) |
Install in this Direction |
2. INSTALL NO. 1 METER HOOD CLUSTER
Click here .gif)
READ NEXT:
SEE MORE:
 Parts Location
PARTS LOCATION ILLUSTRATION
*1 FORWARD RECOGNITION CAMERA
*2 MILLIMETER WAVE RADAR SENSOR ASSEMBLY ILLUSTRATION
*1 INSTRUMENT PANEL JUNCTION BLOCK ASSEMBLY
- ECU-IG1 NO. 3 FUSE *2
DLC3
Diagnosis System
DIAGNOSIS SYSTEM CHECK DLC3 (a) Check the DLC3.
Click here CHECK WARNING LIGHT
(a) When a problem occurs in the power steering system, the EPS warning light in the combination meter assembly comes on to inform the driver of the problem.
*a EPS Warning Light
