
Toyota Camry (XV70): Removal
REMOVAL
CAUTION / NOTICE / HINT
The necessary procedures (adjustment, calibration, initialization, or registration) that must be performed after parts are removed and installed, or replaced during automatic light control sensor removal/installation are shown below.
Necessary Procedures After Parts Removed/Installed/Replaced|
Replaced Part or Performed Procedure |
Necessary Procedure | Effect/Inoperative Function when Necessary Procedure not Performed |
Link |
|---|---|---|---|
|
Disconnect cable from negative battery terminal |
Perform steering sensor zero point calibration |
Lane Tracing Assist System |
|
|
Pre-collision system | |||
|
Memorize steering angle neutral point |
Parking assist monitor system |
| |
|
Panoramic view monitor system |
|
CAUTION:
Some of these service operations affect the SRS airbag system. Read the precautionary notices concerning the SRS airbag system before servicing.
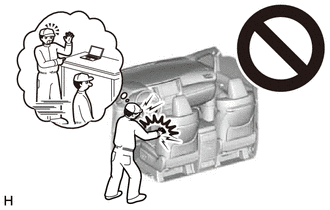
Click here
.gif)
PROCEDURE
1. REMOVE INSTRUMENT PANEL SAFETY PAD SUB-ASSEMBLY
Click here
2. REMOVE NO. 1 SIDE DEFROSTER NOZZLE DUCT
Click here
3. REMOVE NO. 2 SIDE DEFROSTER NOZZLE DUCT
Click here
4. REMOVE DEFROSTER NOZZLE ASSEMBLY
Click here
5. REMOVE AUTOMATIC LIGHT CONTROL SENSOR
| (a) Disconnect the connector. |
|
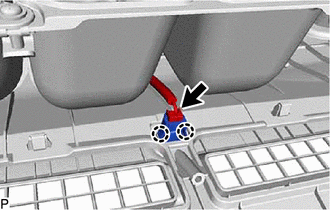
(b) Disengage the 2 claws to remove the automatic light control sensor.
READ NEXT:
 Installation
INSTALLATION PROCEDURE 1. INSTALL AUTOMATIC LIGHT CONTROL SENSOR
(a) Engage the 2 claws to install the automatic light control sensor.
(b) Connect the connector. 2. INSTALL DEFROSTER NOZZLE ASSE
Back-up Light Bulb
ReplacementREPLACEMENT CAUTION / NOTICE / HINT
HINT:
Use the same procedure for the RH side and LH side.
The following procedure is for the LH side.
PROCEDURE 1. REMOVE LUGGAGE COMP
Front Side Marker Light Bulb
ReplacementREPLACEMENT CAUTION / NOTICE / HINT
HINT:
Use the same procedure for the RH side and LH side.
The following procedure is for the LH side.
PROCEDURE 1. REMOVE FRONT SIDE M
SEE MORE:
Black Out Tape (for Rear Door)
ComponentsCOMPONENTS ILLUSTRATION
*1 REAR ARMREST ASSEMBLY
*2 REAR DOOR ARMREST COVER SUB-ASSEMBLY
*3 REAR DOOR INNER GLASS WEATHERSTRIP
*4 REAR DOOR NO. 2 SERVICE HOLE COVER
*5 REAR DOOR TRIM BOARD SUB-ASSEMBLY
*6 REAR POWER WINDOW REG
On-vehicle Inspection
ON-VEHICLE INSPECTION PROCEDURE
1. INSPECT BRAKE FLUID LEVEL IN RESERVOIR
(a) Check the fluid level. If the brake fluid level is lower than the MIN line, inspect for brake fluid leaks and brake pad wear. If necessary, refill the reservoir with brake fluid to the MAX line after repair or repl
