Toyota Camry (XV70): Removal
REMOVAL
CAUTION / NOTICE / HINT
The necessary procedures (adjustment, calibration, initialization or registration) that must be performed after parts are removed and installed, or replaced during sliding roof housing removal/installation are shown below.
Necessary Procedures After Parts Removed/Installed/Replaced|
Replaced Part or Performed Procedure |
Necessary Procedure | Effect/Inoperative Function when Necessary Procedure not Performed |
Link |
|---|---|---|---|
| Initialize Sliding Roof System |
|
|
|
Disconnect cable from negative battery terminal |
Perform steering sensor zero point calibration |
Lane Tracing Assist System |
|
|
Pre-collision System | |||
|
Memorize steering angle neutral point |
Parking Assist Monitor System |
| |
|
Panoramic view monitor system |
|
CAUTION:
Some of these service operations affect the SRS airbag system. Read the precautionary notices concerning the SRS airbag system before servicing.
Click here .gif)
.png)
PROCEDURE
1. REMOVE SLIDING ROOF SIDE GARNISH LH
| (a) Disengage the 4 claws to remove the sliding roof side garnish LH. |
|
2. REMOVE SLIDING ROOF SIDE GARNISH RH
HINT:
Use the same procedure as for the LH side.
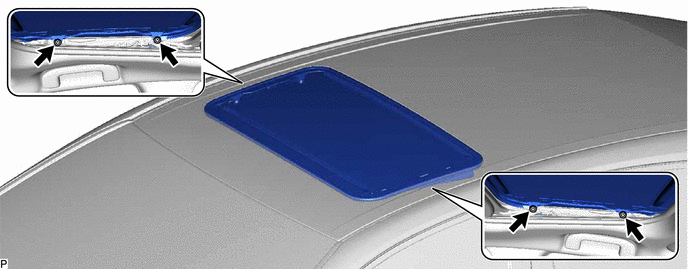
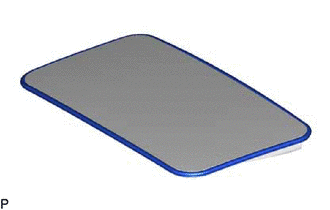
3. REMOVE SLIDING ROOF GLASS SUB-ASSEMBLY
(a) Move the sliding roof glass sub-assembly to the fully closed position.
(b) Using a T25 "TORX" socket wrench, remove the 4 screws and sliding roof glass sub-assembly.
NOTICE:
To prevent the sliding roof glass sub-assembly and sliding roof drive gear sub-assembly from becoming misaligned, move the sliding roof glass sub-assembly (sliding roof drive cable sub-assembly) to the fully closed position before removing it.
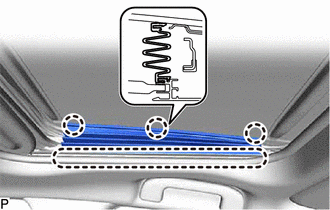
4. REMOVE SLIDING ROOF WEATHERSTRIP
| (a) Remove the sliding roof weatherstrip from the sliding roof panel sub-assembly. |
|
5. REMOVE CURTAIN SHIELD AIRBAG ASSEMBLY LH
Click here
6. REMOVE CURTAIN SHIELD AIRBAG ASSEMBLY RH
HINT:
Use the same procedure as for the LH side.
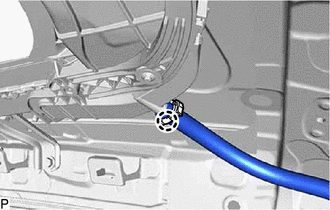
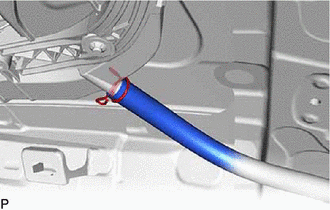
7. DISCONNECT SLIDING ROOF DRAIN HOSE
HINT:
Use the same procedure for all of the sliding roof drain hoses.
| (a) for Clamp Type: (1) Disengage the claw and disconnect the sliding roof drain hose. |
|
| (b) for Clip Type: (1) Expand the clip and disconnect the sliding roof drain hose. |
|
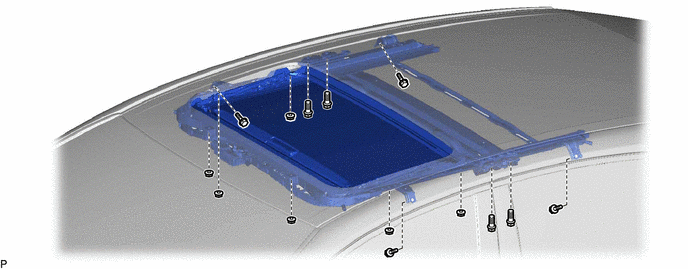
8. REMOVE SLIDING ROOF HOUSING ASSEMBLY
(a) Remove the 8 bolts, 6 nuts and sliding roof housing assembly.
READ NEXT:
 Disassembly
DISASSEMBLY PROCEDURE 1. REMOVE SLIDING ROOF DRIVE GEAR SUB-ASSEMBLY
(a) Remove the bolt.
Remove in this Direction (b) Disengage the claw and guide as shown in the illustrat
Reassembly
REASSEMBLY PROCEDURE 1. INSTALL ROOF WIND DEFLECTOR PANEL SUB-ASSEMBLY
(a) Move the roof wind deflector panel sub-assembly in the direction indicated by the arrow (1) shown in the illustration to e
Installation
INSTALLATION PROCEDURE 1. INSTALL SLIDING ROOF HOUSING ASSEMBLY
(a) Loosen the 4 bolts of the brackets of the sliding roof housing assembly.
(b) Temporarily install the sliding roof housing asse
SEE MORE:
Transfer System
PrecautionPRECAUTION
PRECAUTION (a) Before disassembling the transfer assembly, thoroughly clean it to remove any foreign matter. This will help prevent contamination inside the transfer during disassembly and reassembly.
(b) When removing the transfer cover or any other light alloy parts, do no
EVAP System Tank Vapor Line Restricted/Blocked (P00FE00)
DTC SUMMARY
DTC No. Detection Item
DTC Detection Condition Trouble Area
MIL Memory
Note P00FE00
EVAP System Tank Vapor Line Restricted/Blocked
Leak detection pump creates negative pressure (vacuum) in EVAP system and EVAP system pressure is measured. When t
