
Toyota Camry (XV70): Components
COMPONENTS
ILLUSTRATION
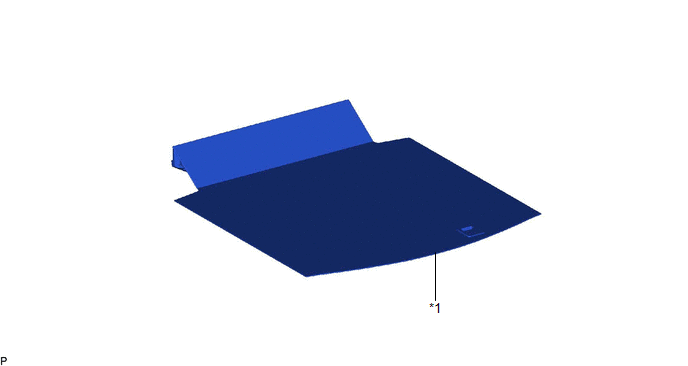
|
*1 | SPARE WHEEL COVER ASSEMBLY |
- | - |
ILLUSTRATION
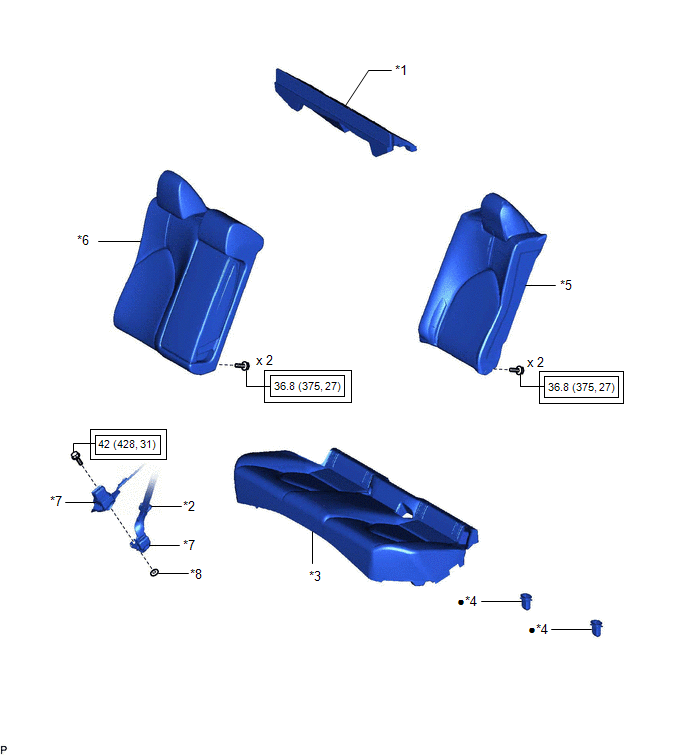
|
*1 | LUGGAGE COMPARTMENT TRIM INNER PAD |
*2 | REAR CENTER SEAT OUTER BELT ASSEMBLY |
|
*3 | REAR SEAT CUSHION ASSEMBLY |
*4 | REAR SEAT CUSHION LOCK HOOK |
|
*5 | REAR SEATBACK ASSEMBLY LH |
*6 | REAR SEATBACK ASSEMBLY RH |
|
*7 | REAR SEAT INNER BELT ASSEMBLY RH |
*8 | WASHER |
.png) |
Tightening torque for "Major areas involving basic vehicle performance such as moving/turning/stopping": N*m (kgf*cm, ft.*lbf) |
● | Non-reusable part |
ILLUSTRATION
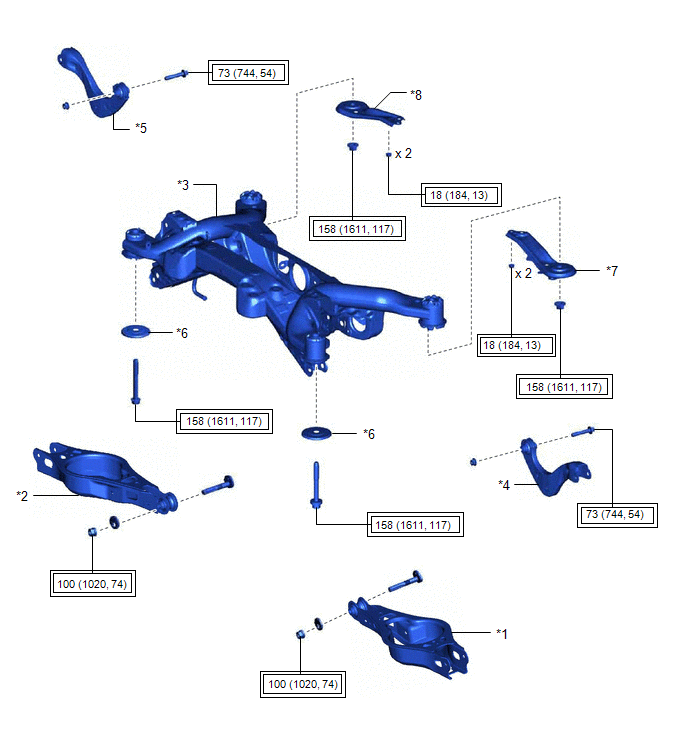
|
*1 | REAR NO. 2 SUSPENSION ARM ASSEMBLY LH |
*2 | REAR NO. 2 SUSPENSION ARM ASSEMBLY RH |
|
*3 | REAR SUSPENSION MEMBER SUB-ASSEMBLY |
*4 | REAR UPPER CONTROL ARM ASSEMBLY LH |
|
*5 | REAR UPPER CONTROL ARM ASSEMBLY RH |
*6 | REAR SUSPENSION MEMBER LOWER STOPPER |
|
*7 | REAR SUSPENSION MEMBER LOWER BRACE LH |
*8 | REAR SUSPENSION MEMBER LOWER BRACE RH |
|
|
Tightening torque for "Major areas involving basic vehicle performance such as moving/turning/stopping": N*m (kgf*cm, ft.*lbf) |
- | - |
ILLUSTRATION
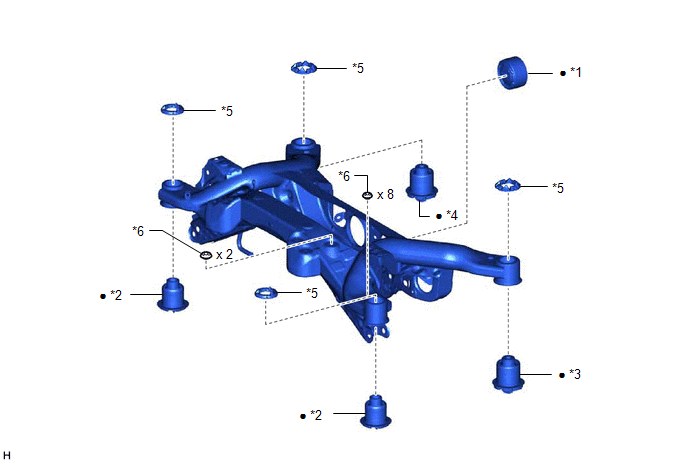
|
*1 | REAR NO. 1 DIFFERENTIAL MOUNT CUSHION |
*2 | REAR SUSPENSION MEMBER FRONT BODY MOUNTING CUSHION |
|
*3 | REAR SUSPENSION MEMBER REAR BODY MOUNT CUSHION LH |
*4 | REAR SUSPENSION MEMBER REAR BODY MOUNT CUSHION RH |
|
*5 | REAR SUSPENSION MEMBER CUSHION |
*6 | HOLE PLUG |
|
● | Non-reusable part |
- | - |
READ NEXT:
 Removal
REMOVAL CAUTION / NOTICE / HINT
The necessary procedures (adjustment, calibration, initialization, or registration) that must be performed after parts are removed and installed, or replaced during r
Installation
INSTALLATION PROCEDURE 1. INSTALL HOLE PLUG
(a) Install the 10 hole plugs to the rear suspension member sub-assembly.
HINT: There are 2 different shapes of hole plug.
2. INS
SEE MORE:
Brake Switch "A" Signal Compare Failure (P057162)
DESCRIPTION When the brake pedal is depressed, the stop light switch assembly outputs a signal to the ECM. The ECM uses this signal to control cancellation of vehicle speed by the dynamic radar cruise control. When the ECM determines that terminals STP and ST1- of the stop light switch assembly are
Changing shift ranges in S mode
When the shift lever is in the S position, the shift lever or paddle shift
switches (if equipped) can be operated as follows:
Shift lever
Paddle shift switches (if
equipped)
Upshifting
Downshifting
The initial shift range in S mode is set automatically to 4, 5 or 6
according to veh
