Toyota Camry (XV70): Reassembly
REASSEMBLY
CAUTION / NOTICE / HINT
HINT:
- Use the same procedure for the RH side and LH side.
- The following procedure is for the LH side.
PROCEDURE
1. INSTALL REAR COMBINATION LIGHT LENS AND BODY (for Bulb Type Back-up Light)
2. INSTALL REAR COMBINATION LIGHT SOCKET AND WIRE (for Bulb Type Back-up Light)
| (a) Engage the clamp to install the rear combination light socket and wire. |
|
.png)
3. INSTALL REAR COMBINATION LIGHT CORD (for LED Type Back-up Light)
| (a) Connect the connector. |
|
.png)
(b) Engage the 2 clamps to install the rear combination light cord.
4. INSTALL REAR COMBINATION LIGHT GASKET (for Bulb Type Back-up Light)
| (a) Install a new rear combination light gasket. |
|
.png)
5. INSTALL REAR COMBINATION LIGHT LED (for Bulb Type Back-up Light)
(a) Turn the rear combination light LED as shown in the illustration to temporarily install it.
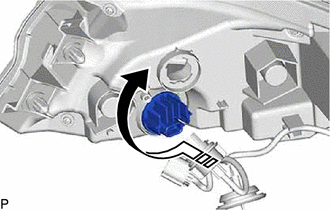
.png) |
Install in this Direction |
| (b) Install the rear combination light LED with the screw. |
|

(c) Connect the connector.
6. INSTALL REAR TURN SIGNAL LIGHT BULB (for Bulb Type Back-up Light)
(a) Install the rear turn signal light bulb to the rear combination light socket and wire.
(b) Turn the rear combination light socket and wire with the rear turn signal light bulb as shown in the illustration to connect them as a unit.
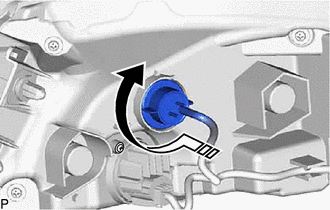
|
|
Install in this Direction |
7. INSTALL REAR SIDE MARKER LIGHT BULB (for Bulb Type Back-up Light)
(a) Install the rear side marker light bulb to the rear combination light socket and wire.
(b) Turn the rear combination light socket and wire with the rear side marker light bulb as shown in the illustration to connect them as a unit.
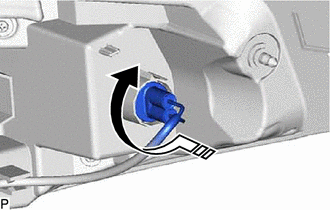
|
|
Install in this Direction |
READ NEXT:
 Installation
INSTALLATION CAUTION / NOTICE / HINT
HINT:
Use the same procedure for the RH side and LH side.
The following procedure is for the LH side.
PROCEDURE 1. INSTALL REAR COMBINATION LIGH
Components
COMPONENTS ILLUSTRATION
*1 LUGGAGE COMPARTMENT DOOR COVER
- - ILLUSTRATION
*A for LED Type Back-up Light
*B for Bulb Type Back-up Light
*1
SEE MORE:
Parking Brake Switch Circuit
DESCRIPTION The main body ECU (multiplex network body ECU) detects the condition of the parking brake switch assembly. WIRING DIAGRAM
CAUTION / NOTICE / HINT
NOTICE: Before replacing the main body ECU (multiplex network body ECU), refer to Registration.*
Click here
*: w/ S
Engine coolant
The coolant level is satisfactory if it is between the "F" and "L" lines on
the reservoir when the engine is cold.
Reservoir cap
"F" line
"L" line
If the level is on or below the "L"
line, add coolant up to the "F" line.
■Coolant selection
Only use "Toyota Super Long Life Coolant"
