Toyota Camry (XV70): Removal
REMOVAL
PROCEDURE
1. REMOVE REAR LIGHT ASSEMBLY LH
Click here .gif)
2. REMOVE REAR LIGHT ASSEMBLY RH
HINT:
Use the same procedure as for the LH side.
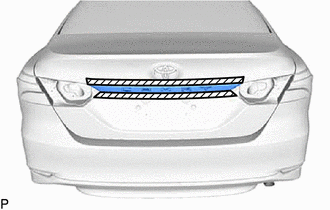
3. REMOVE NO. 3 LUGGAGE COMPARTMENT DOOR OUTSIDE GARNISH
(a) Using a screwdriver with its tip wrapped with protective tape, disengage the 12 claws to remove the No. 3 luggage compartment door outside garnish as shown in the illustration.
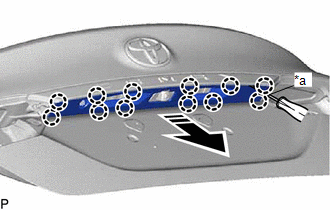
|
*a | Protective Tape |
.png) |
Remove in this Direction |
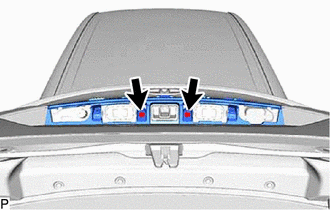
4. REMOVE LUGGAGE COMPARTMENT DOOR OUTSIDE GARNISH SUB-ASSEMBLY
(a) Apply protective tape around the luggage compartment door outside garnish sub-assembly.
.png) |
Protective Tape |
| (b) Remove the 2 screws. |
|
(c) Using a moulding remover, disengage the 4 clips and remove the luggage compartment door outside garnish sub-assembly as shown in the illustration.
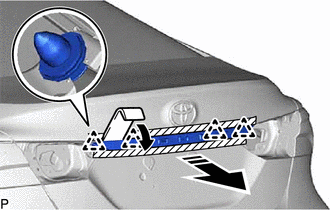
|
|
Remove in this Direction |
(d) Remove the 4 clips from the luggage compartment door outside garnish sub-assembly.
READ NEXT:
 Disassembly
DISASSEMBLY PROCEDURE 1. REMOVE NO. 2 LUGGAGE COMPARTMENT DOOR NAME PLATE
Click here
2. REMOVE LUGGAGE COMPARTMENT DOOR OUTSIDE GARNISH PROTECTOR
(a) Remove the luggage compartment doo
Reassembly
REASSEMBLY PROCEDURE 1. INSTALL LUGGAGE COMPARTMENT DOOR OUTSIDE GARNISH PROTECTOR
HINT: When installing the luggage compartment door outside garnish protector, heat the luggage compartment door ou
Installation
INSTALLATION PROCEDURE 1. INSTALL LUGGAGE COMPARTMENT DOOR OUTSIDE GARNISH SUB-ASSEMBLY
(a) Install 4 new clips to the luggage compartment door outside garnish sub-assembly.
(b) Engage the 4 cli
SEE MORE:
Do-it-yourself service
precautions
If you perform maintenance by yourself, be sure to follow the
correct procedure as given in these sections.
WARNING
The engine compartment contains many mechanisms and fluids that may
move suddenly, become hot, or become electrically energized. To avoid death
or serious injury, observe the fo
Problem Symptoms Table
PROBLEM SYMPTOMS TABLE
HINT:
Use the table below to help determine the cause of problem symptoms.
Inspect the fuses and relays related to this system before inspecting the suspected areas below.
Because the order of diagnosis is important to allow correct diagnosis, make sure to begi
