Toyota Camry (XV70): Washer Nozzle
Components
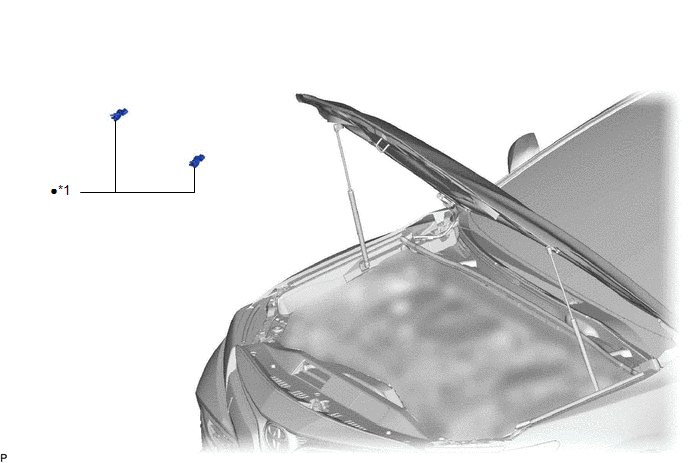
COMPONENTS
ILLUSTRATION
|
*1 | WASHER NOZZLE SUB-ASSEMBLY |
- | - |
|
● | Non-reusable part |
- | - |
On-vehicle Inspection
ON-VEHICLE INSPECTION
PROCEDURE
1. INSPECT WASHER NOZZLE SUB-ASSEMBLY
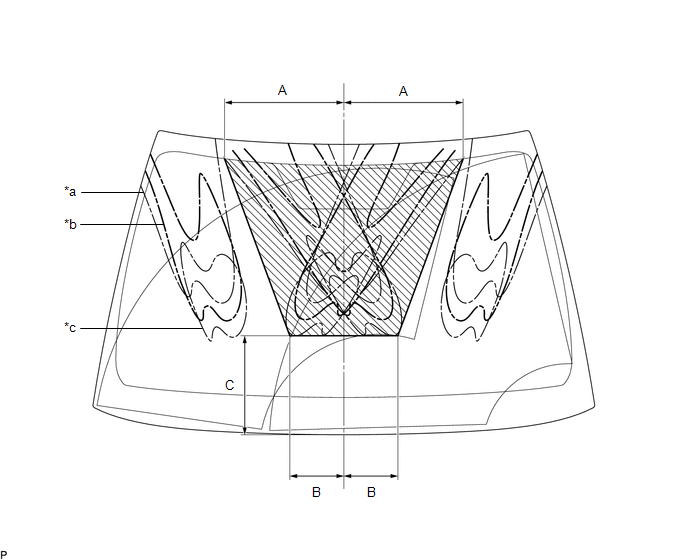
(a) Operate the washer nozzle sub-assemblies and check the position that the washer fluid contacts the windshield.
Standard:
Center of washer fluid contacts the windshield in the areas shown in the illustration.
|
*a | Upper Limit |
*b | Standard |
|
*c | Lower Limit |
- | - |
.png) |
Measurement | - |
- |
Standard Measurement:
|
Area | Measurement |
Area | Measurement |
|---|---|---|---|
|
A | 35.8 cm (1.17 ft.) |
B | 161.7 mm (6.37 in.) |
|
C | 297.5 mm (11.7 in.) |
- | - |
HINT:
If the result is not as specified, replace the washer nozzle sub-assembly.
Removal
REMOVAL
CAUTION / NOTICE / HINT
HINT:
- Use the same procedure for the RH side and LH side.
- The following procedure is for the LH side.
PROCEDURE
1. REMOVE WASHER NOZZLE SUB-ASSEMBLY
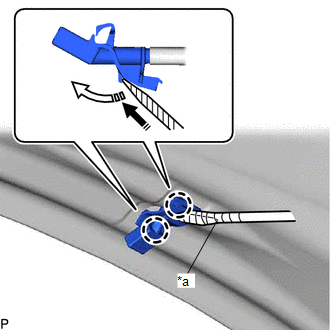
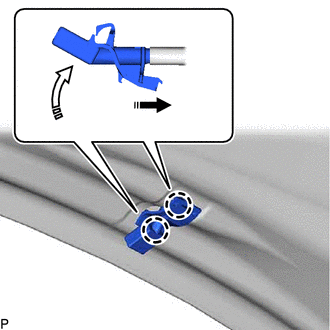
(a) Using a screwdriver, disengage the 2 claws as indicated by the arrows, in the order shown in the illustration to separate the washer nozzle sub-assembly.
|
*a | Protective Tape |
.png) |
Remove in this Direction (1) |
.png) |
Remove in this Direction (2) |
NOTICE:
Be careful not to damage the windshield glass.
HINT:
Tape the screwdriver tip before use.
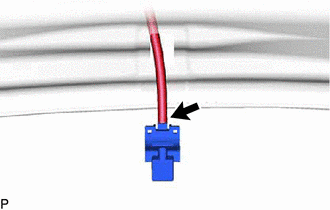
| (b) Disconnect the washer hose to remove the washer nozzle sub-assembly. NOTICE: Washer nozzle sub-assemblies cannot be reused. |
|
Adjustment
ADJUSTMENT
PROCEDURE
1. REMOVE WASHER NOZZLE SUB-ASSEMBLY
Click here
.gif)
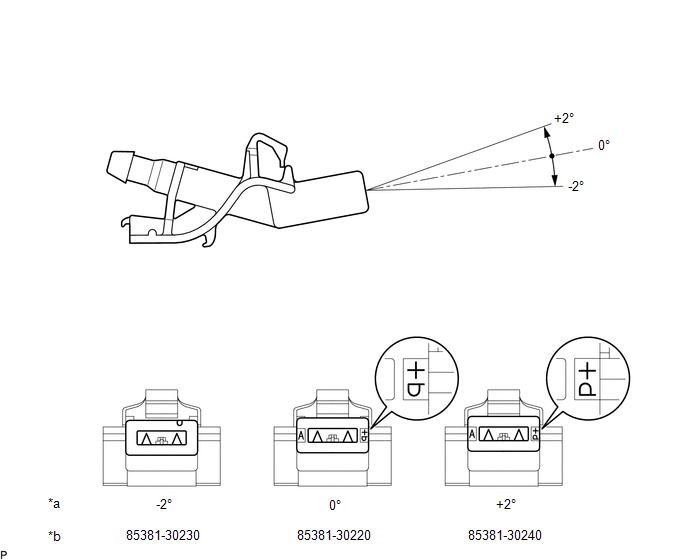
2. ADJUST WASHER NOZZLE SUB-ASSEMBLY
(a) Select a washer nozzle sub-assembly so the position the washer fluid hits the windshield will be within the standard area. Replace the washer nozzle sub-assembly with the selected one.
|
*a | Washer Fluid Spray Angle |
*b | Part Number |
3. INSTALL WASHER NOZZLE SUB-ASSEMBLY
Click here
Installation
INSTALLATION
CAUTION / NOTICE / HINT
HINT:
- Use the same procedure for the RH side and LH side.
- The following procedure is for the LH side.
PROCEDURE
1. INSTALL WASHER NOZZLE SUB-ASSEMBLY
(a) Connect a new washer nozzle sub-assembly to the washer hose.
(b) Engage the 2 claws as indicated by the arrows, in the order shown in the illustration to install the washer nozzle sub-assembly.
.png) |
Install in this Direction (1) |
.png) |
Install in this Direction (2) |
2. INSPECT WASHER NOZZLE SUB-ASSEMBLY
Click here
.gif)
3. ADJUST WASHER NOZZLE SUB-ASSEMBLY
Click here
READ NEXT:
 Precaution
PRECAUTION PRECAUTION FOR DISCONNECTING CABLE FROM NEGATIVE BATTERY TERMINAL
NOTICE: When disconnecting the cable from the negative (-) battery terminal, initialize the following systems after the
Parts Location
PARTS LOCATION ILLUSTRATION
*1 WINDSHIELD WIPER MOTOR ASSEMBLY
*2 LEVEL WARNING SWITCH ASSEMBLY
*3 WINDSHIELD WASHER MOTOR AND PUMP ASSEMBLY
*4 ENGINE ROOM
SEE MORE:
Precaution
PRECAUTION PRECAUTION FOR DISCONNECTING CABLE FROM NEGATIVE BATTERY TERMINAL
NOTICE: When disconnecting the cable from the negative (-) battery terminal, initialize the following systems after the cable is reconnected.
System Name See Procedure
Lane Tracing Assist System
Display does not Dim when Light Control Switch is Turned ON
CAUTION / NOTICE / HINT
NOTICE:
Depending on the parts that are replaced during vehicle inspection or maintenance, performing initialization, registration or calibration may be needed. Refer to Precaution for Navigation System.
Click here
When replacing the radio and display receiver
