Toyota Camry (XV70): A25a-fks Air Cleaner Filter Element
Components
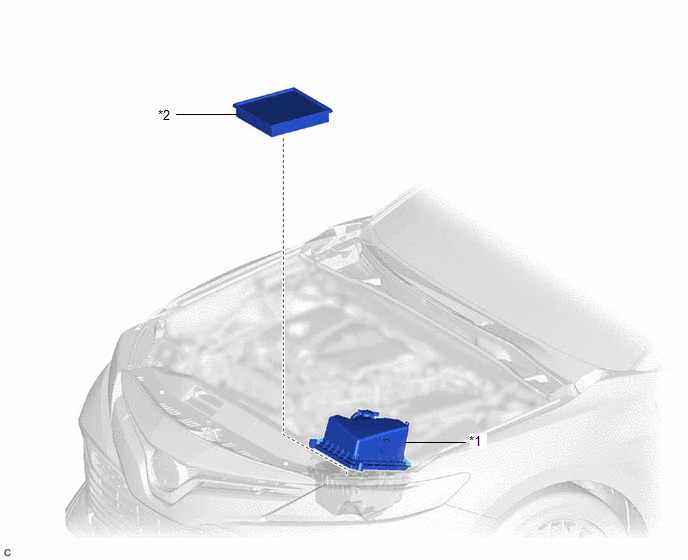
COMPONENTS
ILLUSTRATION
|
*1 | AIR CLEANER CAP SUB-ASSEMBLY |
*2 | AIR CLEANER FILTER ELEMENT SUB-ASSEMBLY |
Removal
REMOVAL
PROCEDURE
1. SEPARATE AIR CLEANER CAP SUB-ASSEMBLY
| (a) Disengage the 2 wire harness clamps. |
|
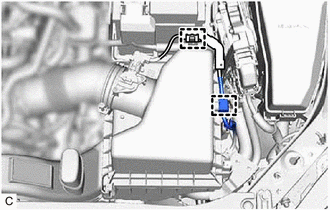
| (b) Disengage the 2 air cleaner cap clamps. |
|
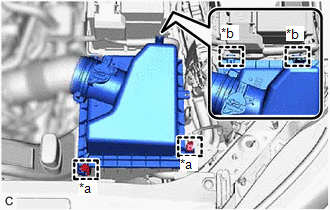
(c) Disengage the 2 guides to separate the air cleaner cap sub-assembly from the air cleaner case sub-assembly.
2. REMOVE AIR CLEANER FILTER ELEMENT SUB-ASSEMBLY
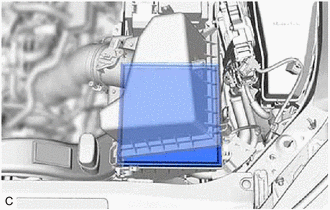
| (a) Remove the air cleaner filter element sub-assembly from the air cleaner case sub-assembly. NOTICE: Do not allow foreign matter to enter the air cleaner cap sub-assembly and air cleaner case sub-assembly. |
|
3. INSPECT AIR CLEANER FILTER ELEMENT SUB-ASSEMBLY
HINT:
This procedure is only performed when the air cleaner filter element sub-assembly will be reused.
(a) Check whether the air cleaner filter element sub-assembly is dirty or clogged.
| (b) If the air cleaner filter element sub-assembly is dirty or has foreign matter adhered to it, clean the air cleaner filter element sub-assembly with compressed air. NOTICE: When cleaning the air cleaner filter element sub-assembly, blow the compressed air from the intake downstream side (from the air cleaner cap sub-assembly side). HINT: If the air cleaner filter element sub-assembly is still extremely dirty after cleaning it, replace the air cleaner filter element sub-assembly with a new one. |
|
.png)
Installation
INSTALLATION
PROCEDURE
1. INSTALL AIR CLEANER FILTER ELEMENT SUB-ASSEMBLY
(a) Check that the inside of the air cleaner case sub-assembly does not have dirt or deposits, and clean them away if they are present.
(b) Install the air cleaner filter element sub-assembly to the air cleaner case sub-assembly.
2. INSTALL AIR CLEANER CAP SUB-ASSEMBLY
(a) Engage the 2 guides to install the air cleaner cap sub-assembly to the air cleaner case sub-assembly.
(b) Engage the 2 air cleaner cap clamps.
(c) Engage the 2 wire harness clamps.
READ NEXT:
 Components
COMPONENTS ILLUSTRATION
*1 BATTERY
*2 NEGATIVE BATTERY TERMINAL
*3 POSITIVE BATTERY TERMINAL
*4 NO. 2 BATTERY CLAMP
*5 BATTERY TERMINAL CAP
- -
Removal
REMOVAL CAUTION / NOTICE / HINT
The necessary procedures (adjustment, calibration, initialization, or registration) that must be performed after parts are removed, installed, or replaced during the
SEE MORE:
Engine maintenance
Drive belt
Drive belt : inspection
Alternator
Drive belt auto-tensioner
Crankshaft pulley
A/c compressor
Water pump
Drive belt
Possible use range
New drive belt range
Ndicator
Warning:
Perform this step when engine is stopped.
Check that the indicator of drive bel
Dtc Check / Clear
DTC CHECK / CLEAR CHECK FOR DTC (a) Check for DTCs (Test Failed / Pending / Confirmed). Body Electrical > Road Sign Assist > Trouble Codes
Techstream Display Description
Test Failed Shows the malfunction judgment results during the current trip.
Pending Shows the ma
