
Toyota Camry (XV70): Components
COMPONENTS
ILLUSTRATION
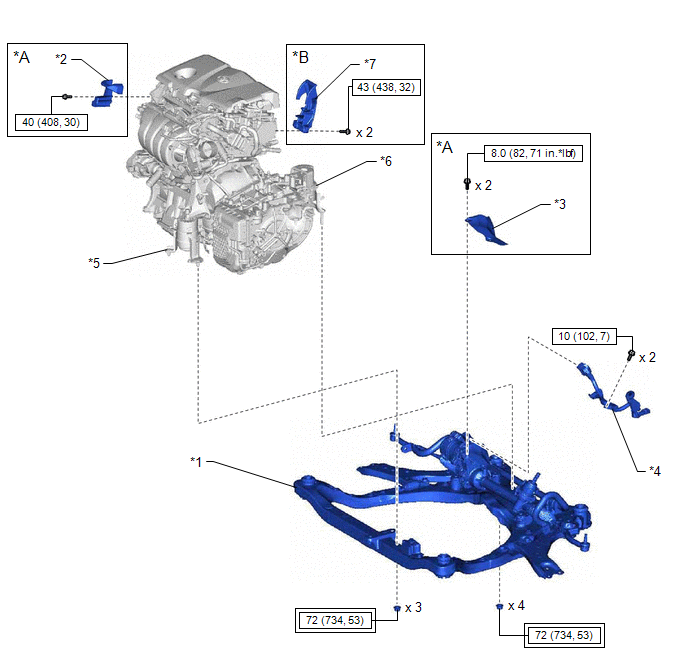
|
*A | for A25A-FKS |
*B | for AWD |
|
*1 | FRONT FRAME ASSEMBLY |
*2 | FUEL DELIVERY GUARD |
|
*3 | STEERING GEAR HEAT INSULATOR |
*4 | WIRE HARNESS |
|
*5 | FRONT ENGINE MOUNTING INSULATOR |
*6 | REAR ENGINE MOUNTING INSULATOR |
|
*7 | FUEL PUMP PROTECTOR |
- | - |
.png) |
Tightening torque for "Major areas involving basic vehicle performance such as moving/turning/stopping": N*m (kgf*cm, ft.*lbf) |
.png) |
N*m (kgf*cm, ft.*lbf): Specified torque |
ILLUSTRATION
|
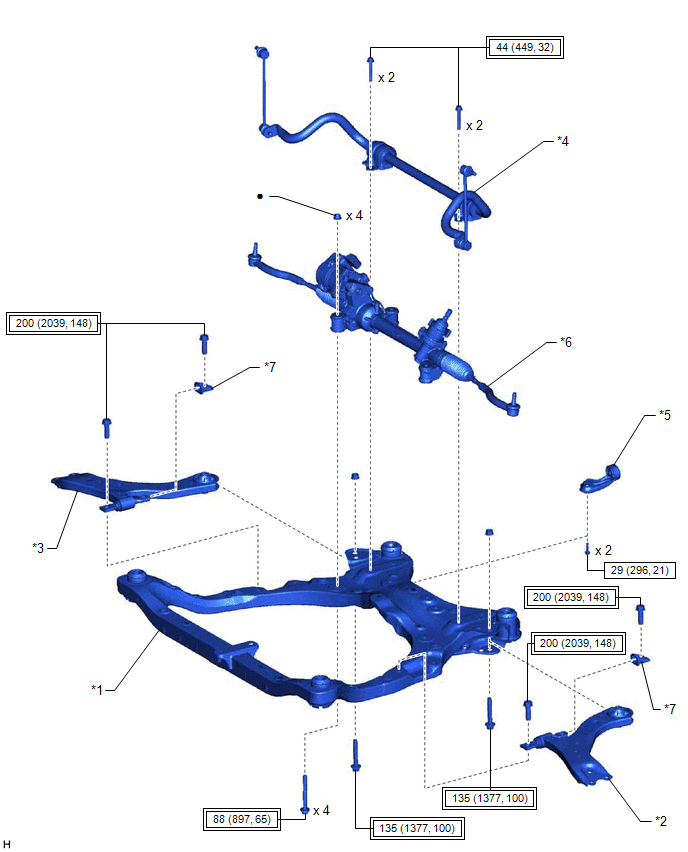
*1 | FRONT FRAME ASSEMBLY |
*2 | FRONT LOWER NO. 1 SUSPENSION ARM SUB-ASSEMBLY LH |
|
*3 | FRONT LOWER NO. 1 SUSPENSION ARM SUB-ASSEMBLY RH |
*4 | FRONT STABILIZER BAR WITH BRACKET |
|
*5 | NO. 2 EXHAUST PIPE SUPPORT BRACKET |
*6 | RACK AND PINION POWER STEERING GEAR ASSEMBLY |
|
*7 | FRONT LOWER ARM BUSHING STOPPER |
- | - |
|
|
Tightening torque for "Major areas involving basic vehicle performance such as moving/turning/stopping": N*m (kgf*cm, ft.*lbf) |
|
N*m (kgf*cm, ft.*lbf): Specified torque |
|
● | Non-reusable part |
- | - |
ILLUSTRATION
|
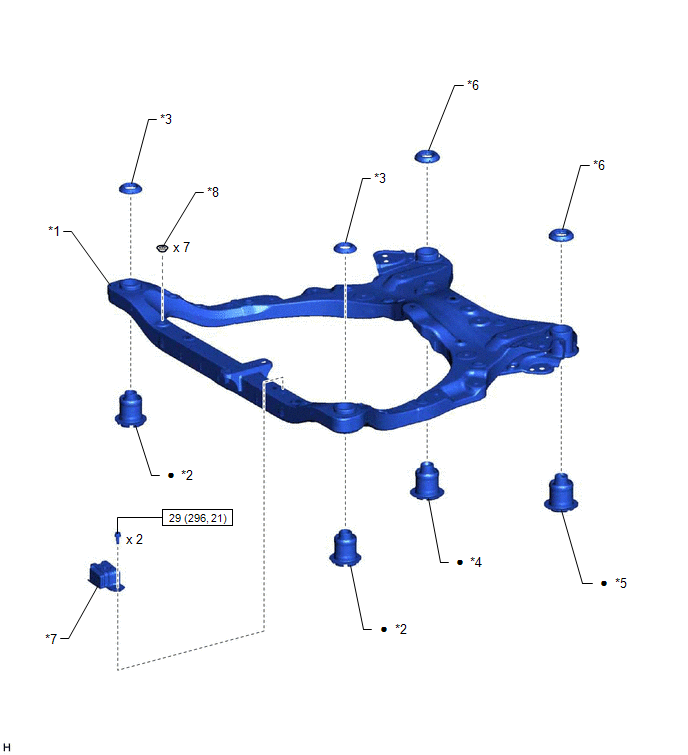
*1 | FRONT FRAME ASSEMBLY |
*2 | FRONT SUSPENSION MEMBER BODY MOUNTING FRONT CUSHION |
|
*3 | FRONT SUSPENSION MEMBER BODY MOUNTING FRONT STOPPER |
*4 | FRONT SUSPENSION MEMBER BODY MOUNTING REAR CUSHION |
|
*5 | FRONT SUSPENSION MEMBER BODY MOUNTING REAR CUSHION LH |
*6 | FRONT SUSPENSION MEMBER BODY MOUNTING REAR STOPPER |
|
*7 | FRONT SUSPENSION MEMBER DYNAMIC DAMPER |
*8 | HOLE PLUG |
|
|
N*m (kgf*cm, ft.*lbf): Specified torque |
● | Non-reusable part |
READ NEXT:
 Removal
REMOVAL CAUTION / NOTICE / HINT
The necessary procedures (adjustment, calibration, initialization, or registration) that must be performed after parts are removed and installed, or replaced during f
Installation
INSTALLATION PROCEDURE 1. INSTALL HOLE PLUG
(a) Install the 7 hole plugs to the front frame assembly. HINT:
There are 2 different shapes of hole plug.
2. INSTALL FRONT SUSPENSION MEMBER BODY MO
SEE MORE:
How To Proceed With Troubleshooting
CAUTION / NOTICE / HINT
HINT:
Use the following procedure to troubleshoot the power door lock control system.
*: Use the Techstream.
PROCEDURE
1. VEHICLE BROUGHT TO WORKSHOP
NEXT
2.
CUSTOMER PROBLEM ANALYSIS CHECK
HINT:
In troubleshooting,
Removal
REMOVAL CAUTION / NOTICE / HINT
HINT:
Use the same procedure for the RH side and LH side.
The following procedure is for the LH side.
PROCEDURE 1. REMOVE REAR WHEEL Click here
2. SEPARATE REAR DISC BRAKE CALIPER ASSEMBLY Click here
3. REMOVE PARKING BRAKE SHOE ADJUSTING HOLE
