
Toyota Camry (XV70): Removal
REMOVAL
CAUTION / NOTICE / HINT
The necessary procedures (adjustment, calibration, initialization or registration) that must be performed after parts are removed and installed, or replaced during water inlet with thermostat sub-assembly removal/installation are shown below.
Necessary Procedures After Parts Removed/Installed/Replaced|
Replaced Part or Performed Procedure |
Necessary Procedure | Effect/Inoperative Function when Necessary Procedure not Performed |
Link |
|---|---|---|---|
|
Battery terminal is disconnected/reconnected |
Perform steering sensor zero point calibration |
Lane Tracing Assist System |
|
|
Pre-collision system | |||
|
Memorize steering angle neutral point |
Parking assist monitor system |
| |
|
Panoramic view monitor system |
|
NOTICE:
This procedure includes the removal of small-head bolts. Refer to Small-Head Bolts of Basic Repair Hint to identify the small-head bolts.
Click here .gif)
PROCEDURE
1. DRAIN ENGINE COOLANT
Click here
2. REMOVE GENERATOR ASSEMBLY
Click here
3. DISCONNECT NO. 2 RADIATOR HOSE
Click here
4. REMOVE WATER INLET WITH THERMOSTAT SUB-ASSEMBLY
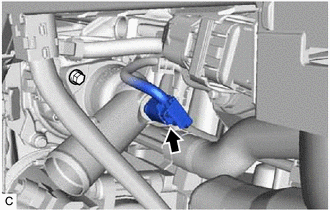
| (a) Disconnect the water inlet with thermostat sub-assembly connector. |
|
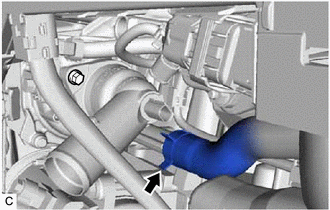
| (b) Slide the clip and disconnect the No. 7 water by-pass hose from the water inlet with thermostat sub-assembly. NOTICE:
HINT: When disconnecting the No. 7 water by-pass hose, slide the clip, rotate the hose and pull it straight off the pipe. |
|
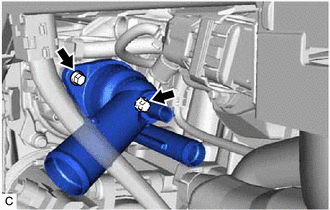
| (c) Using an 8 mm socket wrench, remove the 2 bolts and water inlet with thermostat sub-assembly. |
|
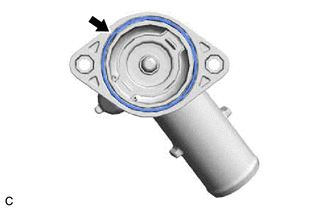
| (d) Remove the gasket from the water inlet with thermostat sub-assembly. |
|
READ NEXT:
 Inspection
INSPECTION PROCEDURE 1. INSPECT WATER INLET WITH THERMOSTAT SUB-ASSEMBLY
CAUTION:
Do not put your hands into the water that has been heated for the inspection.
Touching the heated water
Installation
INSTALLATION CAUTION / NOTICE / HINT
NOTICE: This procedure includes the installation of small-head bolts. Refer to Small-Head Bolts of Basic Repair Hint to identify the small-head bolts.
Click he
Water Pump
ComponentsCOMPONENTS ILLUSTRATION
*1 ENGINE WATER PUMP ASSEMBLY (WATER INLET HOUSING)
*2 GASKET
N*m (kgf*cm, ft.*lbf): Specified torque
● Non-reusable
SEE MORE:
Reassembly
REASSEMBLY CAUTION / NOTICE / HINT
HINT:
Use the same procedure for the RH side and LH side.
The following procedure is for the LH side.
PROCEDURE 1. INSTALL SIDE TURN SIGNAL LIGHT ASSEMBLY (w/ Side Turn Signal Light)
Click here 2. INSTALL NO. 2 OUTER MIRROR COVER (for Type A
Removal
REMOVAL CAUTION / NOTICE / HINT
The necessary procedures (adjustment, calibration, initialization or registration) that must be performed after parts are removed and installed, or replaced during fuel pump control ECU removal/installation are shown below. Necessary Procedures After Parts Removed/I
