Toyota Camry (XV70): Removal
REMOVAL
PROCEDURE
1. REMOVE FRONT FENDER APRON SEAL RH
Click here .gif)
2. DRAIN ENGINE OIL
Click here
3. REMOVE ENGINE OIL PRESSURE SWITCH ASSEMBLY
| (a) Disengage the clamp to disconnect the wire harness protector. |
|
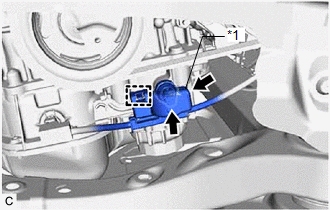
(b) Disconnect the engine oil pressure switch assembly connector.
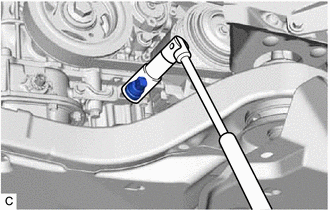
| (c) Using a 24 mm deep socket wrench, remove the engine oil pressure switch assembly. |
|
READ NEXT:
 Inspection
INSPECTION PROCEDURE 1. INSPECT ENGINE OIL PRESSURE SWITCH ASSEMBLY
(a) Disengage the clamp to disconnect the wire harness protector.
*1 Wire Harness Protector
Installation
INSTALLATION PROCEDURE 1. INSTALL ENGINE OIL PRESSURE SWITCH ASSEMBLY
(a) Apply adhesive to 2 or 3 threads of the engine oil pressure switch assembly.
Adhesive: Toyota Genuine Adhesive 1344,
Components
COMPONENTS ILLUSTRATION
*1 ENGINE OIL PRESSURE SWITCH ASSEMBLY
*2 FRONT FENDER APRON SEAL RH
*3 WIRE HARNESS PROTECTOR
- -
N*m (kgf*cm, ft*lbf): Sp
SEE MORE:
Removal
REMOVAL CAUTION / NOTICE / HINT
The necessary procedures (adjustment, calibration, initialization or registration) that must be performed after parts are removed and installed, or replaced during fuel injector assembly removal/installation are shown below. Necessary Procedures After Parts Removed/
Components
COMPONENTS ILLUSTRATION
*1 NO. 1 INSTRUMENT PANEL UNDER COVER SUB-ASSEMBLY
*2 STOP LIGHT SWITCH ASSEMBLY
© 2023-2026 Copyright www.tocamry.com
