Toyota Camry (XV70): Components
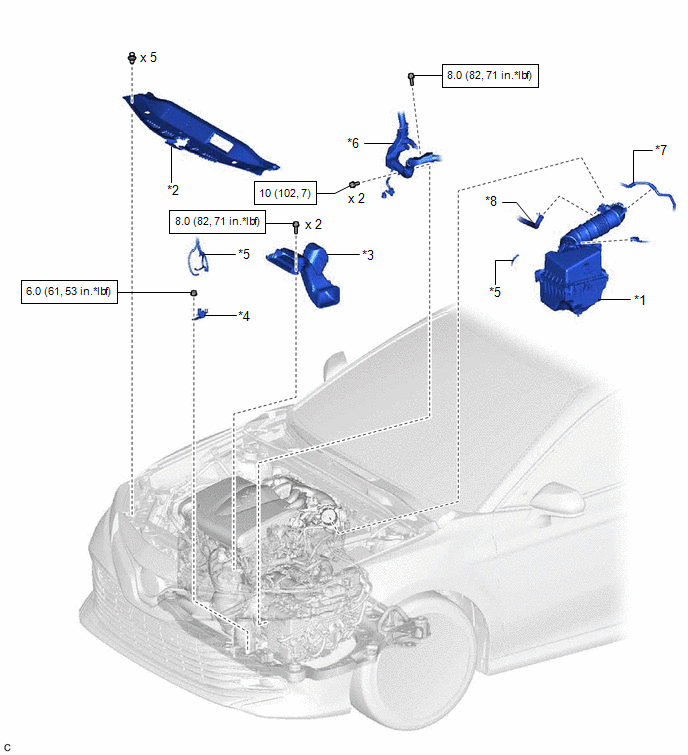
COMPONENTS
ILLUSTRATION
|
*1 | AIR CLEANER ASSEMBLY WITH AIR CLEANER HOSE |
*2 | COOL AIR INTAKE DUCT SEAL |
|
*3 | INLET AIR CLEANER ASSEMBLY |
*4 | VACUUM SWITCHING VALVE (for Active Control Engine Mount System) |
|
*5 | VACUUM HOSE |
*6 | ENGINE WIRE |
|
*7 | NO. 1 FUEL VAPOR FEED HOSE |
*8 | NO. 2 VENTILATION HOSE |
.png) |
N*m (kgf*cm, ft.*lbf): Specified torque |
- | - |
READ NEXT:
 Removal
REMOVAL PROCEDURE 1. REMOVE COOL AIR INTAKE DUCT SEAL
Click here
2. REMOVE INLET AIR CLEANER ASSEMBLY
Click here
3. REMOVE AIR CLEANER ASSEMBLY WITH AIR CLEANER HOSE Click here
Inspection
INSPECTION PROCEDURE 1. INSPECT VACUUM SWITCHING VALVE (for Active Control Engine Mount System)
(a) Measure the resistance.
(1) Measure the resistance according to the value(s) in the table be
Installation
INSTALLATION PROCEDURE 1. INSTALL VACUUM SWITCHING VALVE (for Active Control Engine Mount System)
(a) Install the vacuum switching valve (for active control engine mount system) to the front engine
SEE MORE:
VEHICLE CONTROL HISTORY (RoB)
VEHICLE CONTROL HISTORY (RoB) DESCRIPTION
Vehicle Control History (RoB) is a function that captures and stores ECU data when triggered by specific vehicle behavior.
It may be possible to determine the cause of the malfunction by checking the vehicle history information and freeze frame dat
Components
COMPONENTS ILLUSTRATION
*1 NO. 1 METER HOOD CLUSTER
*2 NO. 2 INSTRUMENT PANEL GARNISH SUB-ASSEMBLY
*3 INSTRUMENT PANEL FINISH PLATE GARNISH
*4 LOWER CENTER INSTRUMENT PANEL FINISH PANEL
*5 SHIFT LOCK RELEASE BUTTON COVER
*6 SHIFT LEVER KNOB SUB
© 2023-2026 Copyright www.tocamry.com
